Tuesday, June 16, 2015

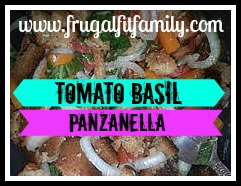
TOMATO BASIL PANZANELLA RECIPE

 
My kids will NOT eat the crusts of bread so when I began my frugal-organic mission, I wasn't about to waste anything! So, I decided to start removing the crusts of the bread BEFORE making the sandwiches! I ended up with lots of bags of crusts in the fridge so I had  to come up with TONS of ways to use them - Check out 10 ways to use bread crusts -they were all pretty good but my favorite has to be the Panzeanella! It is a crowd pleaser and looks so refined that no one would guess that it was actually something that would have been discarded!

My recipes are very simple and please feel free to change up any of the ingredients. I have not indicated amounts because this dish varies based on the leftovers I have, what is in the fridge, and how much bread crust I have on hand so use your intuition and your taste buds!
 
HOMEMADE TOMATO BASIL PANZANELLA 


Ingredients: 
  • Cubed Stale bread (any kind) you can also use fresh bread! Just toast it up in the oven first (croutons!)!
  • Sliced Onions
  • Minced Garlic
  • Diced Tomatoes
  • Basil (fresh basil gives a bright flavor but use whatever is handy for you!)
  • Extra Virgin Olive Oil
  • Red Wine Vinegar
  • Salt and Pepper
  • Sliced Cucumber


Directions:
This time I added peppers to my dressing!
  1. If I can, I make the "dressing" the night before...it really helps the flavors develop! In a mixing bowl add sliced onions, minced garlic, salt and pepper, about half of your basil, olive oil, and vinegar. This is a basic vinaigrette so it has so many uses!
  2. 30 minutes before serving, toss the crusty bread with tomatoes, cucumbers, and your vinaigrette. Let it sit out at room temperature and stir occasionally to get the flavors working together. 
  3.  Top with your remaining basil and serve salad style! 
 Tip: DO NOT PUT THIS IN THE REFRIGERATOR after mixed. It will cause the tomatoes to break down and release their natural waters and will cause your bread to get too soggy. 
 
This isn't the prettiest picture - my kids did the bread tearing for this batch!


 For good measure, here is a gorgeous picture and recipe from The Food Network
CLICK HERE FOR THIS GRILLED PANZANELLA RECIPE

 
I hope you enjoyed this recipe and take away some inspiration to create your own amazing recipes as well create something gorgeous from scraps!
 
Please stop by Frugal Fit Family for more money saving tips, tricks, and recipes to stretch your dollar!


Tuesday, March 24, 2015

Homemade Crispy Kale Chips

 After my many years of struggling with my weight loss goals, I have finally learned one thing....deprivation is detrimental. My unhealthy eating and dieting comes directly from my mother. As a teenager we would regularly go on the "Tuna Fish Diet", "The Soup Diet", or even do an hour of aerobics followed by a large baked potato SMOTHERED in cheese and sour cream....something wasn't working. If these "diets" and methods were the key to losing weight then we would both certainly be skinny. Don't get me wrong we would occasionally see some success and would lose 5-10 pounds only to pack them back on and repeat the process. I carried these yo-yo diets throughout my twenties until I finally figured out what the major problem was....I was depriving myself INSTEAD of building healthy eating habits. If you want to learn more, be sure to follow my website http://www.frugalfitfamily.com

Finally, now - I KNOW BETTER! I learned how to eat and more importantly, how to feed my body with healthier FRESHER foods. I have become addicted to making it to the local Farmers Market as often as I can. They have the best of the best when it comes to local foods and goods made by the people in your neighborhood who can tell you EXACTLY what is in it!

This week, I was again inspired by produce from  "Our Harvest Cooperative"  from the greater Cincinnati, Ohio area who not only grows amazing fruits and veggies but also mixes up some mean culinary concoctions while doing great works all at the same time! They provide foods like salsas, granolas, farm fresh eggs, and more all sustainably grown by local folks! Learn more about them by visiting their Facebook page https://www.facebook.com/OurHarvestCoop and also by checking out their website www.ourharvest.coop . They also provide amazing produce boxes and as someone who loves produce...I can tell you, their stuff is AMAZING!

I crave sweet and salty ALL THE TIME. I had always heard that kale chips were a great substitute for potato chips but I never believed the hype. If I am playing the honesty card, I will admit that they don't taste EXACTLY like potato chips. Kale Chips have their own unique flavor but they are EXCELLENT. They feed your craving for crunchy and salty and are hard to stop eating! They take only about 20 minutes to make and a whole batch of them costs less than $2.00! If you try to buy these babies at the Health Food Store, they will set you back about $8 for a small package!

These kale chips aren't just for dieters! Baked kale is featured on many popular food and cooking shows as an appetizer, garnish, and side dish. You can jazz them up however you want to make them your own.

Yes, they are still green but worth a try!
Yes, Still Green BUT GREAT!

Cook Time

Prep time:
Cook time:
Ready in:
Yields: about 4-6 servings depending on the head of kale

Ingredients

  • 1 bunch Kale
  • 1 teaspoon olive oil
  • 1 teaspoon salt
  • to taste optional seasonings like chili powder, salt, red pepper flakes, curry, etc.

Easy to Make!

  1. Preheat oven to 375 degrees. Spray cookie sheet with non-stick spray (you can use parchment paper if you have it)
  2. Remove thick stems from kale. Wash kale thoroughly under cool running water (kale tends to have particles of dirt trapped in the crevices so wash well). Cut the clean kale into 1 inch pieces.
  3. Toss kale pieces in the olive oil and salt (and any additional seasonings you choose)
  4. Place kale on cookie sheet in a thin layer and bake for about 10 minutes. You will look for the edges to get a bit brown but not burned.
  5. Remove from sheet when cool and START SNACKING!

Make them your own!

There are so many ways to experiment with this recipe. I suggest to first try them as the recipe states and then get crazy! I tend to like mine a bit over cooked with some chili powder.

I WISH I KNEW WHAT MY FIRST BATCH WAS LIKE! I tasted one "chip" from my first batch when my children hijacked the whole bowl. I will say that they are the type of kids who would choose an apple over potato chips and are constantly asking if what they are eating is "healthy". I would like to think that this is because I have taught them better than I was taught as a child....... but you never know, it could have more to do with the amount of children's media regarding healthy diets. I choose parental influence:) Either way, these kale chips were a hit with us ALL!

Enjoy and please let me know of any variations you try and LOVE!


So, what will inspire you this week at the Farmers' Market? Stay tuned to see what inspires me each week at the West Chester, Ohio Farmers Market! You can follow the market on Facebook by clicking HERE.

The Summer Market will take place on Center Pointe Drive between the roundabout and Mid Pointe library from 9 am to 1 pm every Saturday http://westchesterohiofarmersmarket.org/ has more information and details about dates and vendors!

GO OUT, SHOP LOCAL,  AND GET INSPIRED!
 
I hope you enjoyed this recipe and will continue to follow my site Frugal Fit Family! You can follow me on Facebook and Twitter to stay up to the minute with my favorite recipes, organic living tips, and DIY green beauty potions!

Tuesday, February 3, 2015

Super Easy Organic Homemade Crepes!

When I was younger, I used to love going to breakfast and ordering crepes. Not only did I feel a little "fancy" but they were something that I didn't get at home. Sure, ordering pancakes was good too BUT mom made pancakes all the time at home so I wanted something different. Even as an adult...I LOVE a great crepe. Small shops seem to be popping up everywhere and including toppings like fresh fruit, savory cheeses, and even liquor infused crèmes (YUM, btw) so my love affair has continued into  my adulthood.

I realized jut the other day that I had never introduced my kids to my friend "The Crepe". I guess I always thought that they were tough to make which was why I didn't get them at home a lot as a kid...luckily for me, I found that they are actually just as easy as pancakes to make and were a nice break from the norm.

To make crepes, you only need a few ingredients that most folks have in their pantries....while gathering, set your pan on medium high heat and coat with oil. We opt for coconut oil in our house...here is WHY!  Now, I used ALL organic ingredients but feel free to use whatever you like!
  1. 1 cup of Flour
  2.  2 Eggs
  3. 1/2 cup of milk
  4. 1/2 cup of water
  5. 1/4 teaspoon of salt
  6. 2 tablespoons of melted butter
  7. 2 teaspoons of sugar (not all recipes call for this but I still add it :)
It honestly is really simple.
  1. Mix ingredients together to form a smooth batter
  2. Gently ladle some batter into your heated pan.
  3. Either GENTLY use your ladle to make the round crepe or gently rotate the pan allowing the batter to make it's own circle. It should be a super thin "pancake"
  4. Allow the crepe to begin browning then gently use a spatula to lift and flip.
  5. DONE
We were happy with the results!


Now you can fill those crepes with whatever you like! Today my
kids chose Chocolate, Peanut Butter, & Banana (you can snag the Vegan Chocolate Sauce recipe HERE) and Sweet Crème and Berry. Trust me, they all sound fancier than they are....Sweet Crème for us is just sour cream with some sugar and juice!

Let me know how you like to fill (OR TOP - just in case that is the correct way) your Crepe!

Hope you enjoy!
 

Sunday, January 18, 2015

DIY Balsamic Glaze Recipe


I will be the first person to admit that my love for balsamic glaze goes way beyond love.. I am an addict. There is almost nothing in this world that isn't made better by this dark & sweet glaze: pizza; tomatoes; salads; fruits...yep, the list goes on and on. I always ask for it in restaurants when available but have never purchased it for my home due to one main thing...COST.

As we all know, I am first- organic and second -frugal and sadly the options on the retail market didn't fit either. The ingredients lists on most available glazes have things like added sugar, modified starches, and stabilizers - none of which fit my diet needs and the cost is typically a few times higher than a regular bottle of balsamic vinegar!

So, I finally decided it was time to do a little DIY. I was happy to find that making your own glaze was sooo easy!  It really is just reduced balsamic vinegar. You only need one ingredient!
You CAN make it Organic!

What you will need:
Balsamic Vinegar (any brand)

Directions: This honestly can't get any easier
  1.  Pour 2 cups of balsamic glaze into a pan and bring to a simmer
  2. Reduce Heat and let it go for about 20-30 minutes.
  3. Continually check your glaze as burnt vinegar does NOT smell good!
  4. Let it cool and enjoy it. You may find that your glaze gets very firm when stored in the refrigerator. No problem! Just warm it slightly in the microwave before using .

That's it! It is honestly that easy! When your reduction is finished, you will have about 1/4 of the vinegar that you started with. Use this dark goodness on pizzas, pork & chicken dishes,  breads, salads, and even strawberries for a classy sophisticated touch.

Once you make the traditional glaze, you may find yourself wanting to experiment! You can start getting creative by adding in things like fresh herbs and spices. Some people may like to add a little bit of sugar to the vinegar before it simmers to kick up the sweet notes. If you are really feeling sassy, throw in a few blackberries!

If you are looking for something exciting to try your new glaze on...try my O-O Mushetta Pizza! It's inspired by the Holy Shitake pizza from Mellow Mushroom and is a real crowd pleaser!

I promise that the pictures don't do it any justice!

I hope you enjoy your glaze! Be sure to follow me on social media to keep up with all of my healthy and frugal living tips!


Are you addicted to balsamic glaze like I am!? What do you put your glaze on?

Monday, November 10, 2014

Healthy Homemade Ice Cream

I am going to be honest here...I have seen this recipe a few times and never thought that 1) it would actually work and 2) that my kids would accept it as an ice cream replacement. Great news for me....both actually happened.

There are a few reasons that this recipe is now a favorite in my house. The first...it's super inexpensive to make! I am easily able to grab clearance bananas to use which are always marked down at my grocery store to like 19 cents a pound! The second...the health factor is so amped up here. No added sugar, no preservatives, no artificial flavorings...just FRUIT. The third is pretty simple....It tastes great! It has a creamy texture and you can easily add other fruits for different flavors: strawberries, blueberries, peanut butter, blackberries, chocolate chips, etc! As you can see by the photo, my kids opted for chocolate chip. I really didn't feel bad adding them since it was just bananas and chocolate chips!

The steps are SOOOO EASY to do and your kids will love helping!

1) Slice bananas into small discs and freeze in containers or baggies.
2) Load frozen bananas into food processor.
3) BLEND!

Those 3 steps will produce a super creamy "ice cream" that is packed with nutrients and low in calories. It also makes organic ice cream an affordable treat (that crap is expensive at the store!)

I hope you enjoy this recipe and try it at home.

Sunday, October 5, 2014

Super Easy ORGANIC General Tso's Sauce Recipe

When my family and I began our healthy eating journey, we easily gave up having "junk food" around the house", eating fast food, and had no problems choosing organic vs. traditional. We made a pretty smooth transition but after time found that we missed some of our favorite dishes like General Tso's from our neighborhood Chinese restaurant.

This was one dish that I was VERY afraid to try making at home. I have mastered pizza, tortillas, desserts...BUT I was afraid that I wouldn't be able to match the General's Tofu we were used to. I still had to try because the cheat nights at the Chinese restaurant were filled with processed ingredients and sugar. If I could make it myself....we could have it more often without having a cheat day :)

I saw many recipes online and to be honest...some were pretty intimidating. May recipes called for a number of ingredients and most were items that I simply don't keep around the house. The recipe that I ended up with may NOT be a traditional General Tso's BUT it was one that I can make with ingredients that I keep around the house and it was extremely kid friendly!

TIPS:
  • If you are looking for a spicy alternative, you can add fresh jalapenos, sriracha, or dried red pepper flakes. You can also add 1 teaspoon of ginger for extra zing :)
  • Also note that this recipe calls for cornstarch...if you don't have any on hand - simply make a basic roux with butter and flour then add your sauce to it and bring to a simmer!
  • I used all organic ingredients BUT you can use whatever you want
  • If you want to reduce the sugar, try adding more orange juice or stevia!
  • Try blending in 2 tablespoons of peanut butter!
This recipe was just enough for two people..I had to make a triple batch!

INGREDIENTS:
  • 3 tablespoons soy sauce
  • 1/2 squeezed orange
  • 3 tablespoons of sugar
  • 3 tablespoons rice wine (any cooking wine works)
  • 2 teaspoons of cornstarch
  • 2 tablespoons rice wine vinegar
  • 1 teaspoon of minced garlic
DIRECTIONS:
  1. Add all ingredients minus cornstarch and bring to boil to allow the sugar to dissolve.
  2. Wisk in cornstarch and reduce heat.
  3. Your sauce will quickly thicken and be ready to serve over veggies, chicken, beef, or tofu!
I hope you enjoy this version of General Tso's sauce and that it helps to keep you on track with your healthy living goals!

Thursday, September 25, 2014

Organic Coffee's for My Keurig Exist!!! Even Decaf!

Collage_bcg39eweq0au-i6milf1-g20140925-2-1uww0qqjpg?1411652376
I was so happy when I received the email saying that I was chosen to receive a free Keurig 2.0 from Influenster. No joke, I felt like I won the lottery! This thing is AMAZING! Huge beautiful screen, can brew coffee at any set time, and best of all has a large CARAFE so when I am having friends over, there is no need to brew one cup at a time! I plan to go over more features in another post because there is so much to say!smiley

I want to focus on some organic options for any Keurig!

I remember buying my husband our first Keurig a few years ago. We were just starting our organic journey and were excited to see what was out there in the way of organic options...we were kinda sad to see that our local grocery store had NONE! Everything we saw had artificial ingredients and flavors. I was starting to think that I had finally broken down and spent the money on a great machine that would either sit useless or cause us o abandon our new lifestyle. Happily for us...we found some great organic options just a few clicks away!

Keurig - man's Own Organics K-Cup Portion Pack for Keurig K-Cup Brewers, Newman's Own Special Blend, 24 Count

Keurig - man's Own Organics K-Cup Portion Pack for Keurig K-Cup Brewers, Newman's Own Special Blend, 24 Count
This one is a pretty great value! $.71 per cup :)
Keurig - man's Own Organics K-Cup Portion Pack for Keurig K-Cup Brewers, Newman's Own Special Blend, 24 Count - $16.90, 4.99 shipping - Available at Amazon.com Marketplace

Keurig - WICKED JO: 12 Single Serve Cups, SingleCup Jo is for Keurig K-Cup Type Brewers, Bold, Dark, Organic French Roast Coffee, Pure 100% Arabica Coffee, No Additives, USDA Certified Organic, Gourmet Coffee from the Jo Coffee Collection

Keurig - WICKED JO: 12 Single Serve Cups, SingleCup Jo is for Keurig K-Cup Type Brewers, Bold, Dark, Organic French Roast Coffee, Pure 100% Arabica Coffee, No Additives, USDA Certified Organic, Gourmet Coffee from the Jo Coffee Collection

Keurig - Van Houtte Cafe Swiss Water Decaf, Fair Trade & Organic Light Roast Coffee for Keurig Brewers, 24-Count K-Cups (Pack of 2)

Keurig - Van Houtte Cafe Swiss Water Decaf, Fair Trade & Organic Light Roast Coffee for Keurig Brewers, 24-Count K-Cups (Pack of 2)
This one is a little pricier BUT is going to give you tons of decaf flavor and a real coffee house feel. They use a special process to decaffinate the coffee using only water!
Keurig - Van Houtte Cafe Swiss Water Decaf, Fair Trade & Organic Light Roast Coffee for Keurig Brewers, 24-Count K-Cups (Pack of 2) - $44.98, Free shipping - Available at Amazon.com Marketplace

Keurig - "Zaire" Congo Kivu Organic Coffee, 48 ct. FRC Cups for Keurig K-Cup Brewers, Fresh Roasted Coffee LLC

This one is from Africa and boasts some great flavors!
Keurig - "Zaire" Congo Kivu Organic Coffee, 48 ct. FRC Cups for Keurig K-Cup Brewers, Fresh Roasted Coffee LLC - $29.95, Free shipping - Available at Amazon.com Marketplace

Keurig - Nicaraguan Fair Trade Organic - K-Cups

Keurig - Nicaraguan Fair Trade Organic - K-Cups
Another great deal and Fair Trade!
Keurig - Nicaraguan Fair Trade Organic - K-Cups - $17.45, 8.95 shipping - Available at Keurig Canada

Disclosure: This post contains affiliate links provided by Postpresso.

Monday, September 15, 2014

Healthy Toasted Curried Chickpeas

As you all know, the easiest way to stick to any healthy eating plan, is to have the right foods and snacks readily available. This is especially true for those who are trying to stick to an AFFORDABLE diet. It seems like their is a premium on all products with any type of "healthy" label. After eating "clean" for 2 years, my family has found certain snack and foods that SIMPLY have to be in the cupboard.

At first, while I was a work from home mom, there were no convenience foods in the house at all. Everything was made by me including all of our breads, snacks, even cereals! Clearly, as I returned to full time work out of the home....some convenience foods eventually made their way into the house - BUT NOT INTO THE BUDGET. We had done such a good job getting our "frugal life" into check while being organic....now, it was not so in check.

My husband became ADDICTED to these curried cashews that he found at local health food store. They were organic and tasted great but they were $8 a bag! He would easily devour a bag in one sitting! So, to keep his "go-to" snack in our budget, I had to come up with a way to get the flavor without getting the huge price tag....enter- chickpeas!

Over the years, I have found that there are so many things that you can do with chick peas (also called garbanzo beans). I have made "mock" chicken salad, toasted them, turned them into chicken nuggets, and of course made the usual batch of hummus. They are so versatile and lend themselves well to flavors so I though...why not?

This snack is SOOO easy to make and a batch costs way less than the $8 bag of cashews. It is packed with wholesome goodness, can be made organically for no extra cost , and is budget friendly. I use organic seasonings BUT anything will do and they are still a very healthy way to do snack time  :)

You will need:
Plain now...but in a few seconds - AMAZING!
  • 1 can of chick peas
  • olive oil or coconut oil
  • 1 teaspoon. curry powder
  • 1 teaspoon cumin
  • Additional seasonings - I like to put some jalapeno slivers in with them for extra spice...coconut is great to add as well! Add whatever you like!
  • 400 degree Oven
Directions:
  1. Drain the chickpeas and allow to dry. You can also pat dry with a paper towel if you wish.
  2. Toss the chickpeas in the seasonings and just a drizzle of the olive oil.
  3. Coat a pan with olive oil.
  4. Put the chickpeas in the oven for 30-40 minutes or until golden brown and crunchy
  5. Allow to cool and enjoy!
For more easy and healthy chick pea (garbanzo bean) recipes, check these out...


Try my SOY FREE Vegetarian Breakfast Sausage Even the kids LOVE this
recipe and eat it  - usually before I get to! :(


Also please remember to follow me on social media for updates. You can find me on Twitter, Facebook, and my other various outlets! I am always sharing great tips on living organically, vegetarian, and FRUGALLY!

Tuesday, December 3, 2013

Crap, I invited a vegetarian to dinner! 8 things to watch for

I know that , "crap, I invited a vegetarian to dinner" is probably something said by everyone in my family when I RSVP.  They love that I will be there but for some hosts, they stress over what I can and can not eat as a vegetarian. The truth is that it is not easy to be vegetarian these days...meat and byproducts are hidden in many of your favorite dishes- even those that you would think are safe. Take for instance something as simple as sweet potatoes...think they are safe.....they are- until you add gelatin filled marshmallows! Knowing how tough it is, I thought I would share 8 tips for cooking for those crazy veggies!

Here is the first and most important rule to remember as you read the list....we (special eaters) understand the difficulty in editing family dishes to meet our dietary needs...heck, we live it every day! We are totally fine with a plate full of amazing side dishes and desserts (thankfully, most desserts are vegetarian!). We would rather you spend your time enjoying what you cook than worrying about us....but, if you are dead set on being vegetarian friendly...here are 8 tips!


1. Know your "special person".
My tips are just for hidden items and suggestions are all vegetarian and pescatarian friendly. Vegan substitutions for vegans are a bit more work!
  • Vegetarian - does not eat beef, pork, chicken, or seafood (or any other meat that you know of). Will eat eggs, milk, cheeses, and butters.
  • Pescatarians - will eat fish and shellfish BUT no other meat.
  • Vegan - will not eat ANY animal byproduct. No eggs, butter, cheese, milk. No MEAT either!
2. Leave the dressing on the side!
So many hosts think a great salad is perfect for vegetarians...and it is...UNTIL, you dump most dressings on it. This is especially true if you are serving a vegan. Most dressings have hidden flavors,  gelatin, eggs, etc.

Here are three easy to make dressings that are perfect for vegetarians (and meat eaters).
Organic Ranch Dressing that is super yummy and super healthy..CLICK HERE!
Sweet Citrus& Onion Dressing HERE
Easy to make French Dressing HERE


3. Watch out for the breads!
Yep...I said bread. You totally thought bread would be safe right? nope. Check your package of cornbread mix.....most mixes have lard in them which is an animal byproduct. Vegetarian ones are easy to find and the same price.

4. Cheese can have meat in it!
 This is tough for me to accept because I love specialty cheeses. Sadly, many cheese ingredient lists show "enzymes" or "rennet". Some will list that they are from animal or not but others just leave it up to the imagination. For those of you wondering what "enzymes" and "rennet" are, I will spare you the details but will say that they are derived from the inner lining of the fourth stomach of a calf. It is used in the process of making cheeses and some milks. There are vegetarian options for cheese making but you do have to do some investigation about the brands that use them. I can tell you that cream cheeses are safe (they do not use any enzymes to make it) and Organic Farms Valley Organic Cheeses are as well. Everything else is a guessing game and varies by flavor.

5. Using soups for recipes....check them out too!
Sometimes the most vegetarian sounding soup will be filled with a meat flavor. Take for instance Panera's Broccoli Cheddar soup, it has beef flavor in it. Just check out the labels and ingredient lists to be safe.

6. Be on the lookout for gelatin.
Gelatin is hidden everywhere.  For those who are wondering why the jiggly stuff is a no go for vegetarians..... gelatin is “made by prolonged boiling of skin, cartilage and bones from animals.” You can sometimes find kosher gelatin, which is made from fish instead of cow and pig parts. Oops,  I should have warned you to look away first! It is true though. You will find gelatin in dressings, jello, jellies, gummy bears...anything that is thickened. There are vegetarian ways to thicken so just check the labels for the little vegetarian symbol.

7. Spices and sauces!
They are a GREAT idea but just double check the labels. Sometimes, there will be chicken flavor or beef flavor. Worcestershire sauce is usually made with anchovy and beef.

8. MOST IMPORTANTLY....Let us bring something!
We absolutely love being able to bring something to share with everyone. It kinda gives us a thrill to hear meat eaters loving our dishes that are absolutely meat  (and bacon) free! Over the past year or so, I have even watched my husband become a vegetarian because he realized that - when the food is good- you don't need the meat! It actually hides the flavors! So, let us bring a few things!

I hope that this list was helpful in some way! It is not always east but it totally can be done! The best advice is to not overthink it and just keep it simple. The more you add to something, the worse the odds are for a vegetarian. We don't mind bringing items nor do we expect you to veggify every dish. Just leave us some on the side without all the jazz added.

All of the recipes on my site are vegetarian and there are some vegan ones there too! Please be sure to check them out!

ALSO....Looking for What to make? Here are 10 amazing protein sources for vegetarians!

Here are a few of my favorites!


These red pepper and feta zucchini cakes are a huge hit! (just watch the feta)

Sweet and Savory Pumpkin Squash Enchiladas (again, Feta can be omitted)

This black bean soup is AMAZING

Thursday, November 7, 2013

LOW CARB VEGAN Chocolate Sauce - Organic!

Yes...you read it right! This chocolate sauce is low-carb, vegan, and ORGANIC!  I NEVER thought I could find a sweet chocolate sauce that was all 3!! It only takes a few minutes to make and is a fantastic frosting for cupcakes, sauce for ice cream,dip for fruits...you get the idea!

You can change up this sauce in ANY way you want! It is a very basic recipe but can be jazzed up with spicy peppers, mint, nuts, booze, etc!

Now....since I wanted to make my sauce low carb, I used stevia instead of sugar. 1 tablespoon of this sweet chocolate has only 3 grams of carbs! If you are not familiar with stevia, it is an organic sweetener that is notably better for those controlling their sugar intake! Yes, you can use other sugar substitutes in this recipe but I prefer to avoid chemicals whenever I can. Feel free to use your favorite sugar substitute or regular sugar for that matter.

I would also like to add that this totally can be considered HEALTHY chocolate! If you use the vegan recipe and use coconut oil, you are adding so many health benefits! Coconut oil is known to lower cholesterol,  boost metabolism, fight disease.... it is a never ending list of health benefits. You can read more about coconut oil HERE. Now, don't worry if you don't like the taste of coconut. It really doesn't impart too much coconut flavor....my hubby HATES coconut but LOVES when I use it to cook, bake, and make this chocolate sauce!

Ingredients:

  • 1/3 cup sugar (if you are making this LOW CARB by using organic stevia, start with less as it takes less stevia to sweeten)
  • 1 pinch salt
  • 3 tablespoons water
  • 2 tablespoons coconut oil (if you are not vegan, use butter)
  • 1/4 cup organic cocoa powder

Directions:

1) Put sugar, salt and water in a small saucepan over medium heat. Bring to a boil then remove it from the heat
2) Stir in the butter and mix until incorporated (you may want to use a whisk)
3) Add remaining ingredients. Stir until glossy.
4) Pour into glass container.

You can TOTALLY make this in the microwave! Just follow the same steps!

If you enjoyed this easy Vegan recipe...you can check out a few others on my site! I focus on organic cooking that is easy, inexpensive, and that tastes good. After all, if it isn't good....the family isn't going to eat it. It is my challenge to prove that eating healthy does not mean boiled veggies for every meal! I actually aim to prove that healthy food tastes better!

Check out a few recipes while you are here:
Organic Vegan Chicken Salad
Healthy and EASY Organic Black Bean Soup
Healthy Homemade Almond Butter
Soy Free Vegetarian breakfast sausage

Be sure to follow me on Social media to get quick updates!


Tuesday, November 5, 2013

Organic Vegan "Chicken" Salad

I have been a vegetarian for 5 years and I will ALWAYS tell you that I do NOT MISS MEAT! Not one burger looks good enough to eat, not one chicken "chunk" good enough to dunk, nor a hot dog good enough to munch! That being said though...I do miss all of the things that go along with these carnivorous snacks. I do miss sauces, toppings, and condiments. I know that I can eat these on the morning star, boca, and quorn meatless options BUT have you looked at the back of the package? These meatless options are filled with chemicals and additives...things that I am trying to avoid!

So...I found a recipe from my friend over at Hoppy Bottoms for Vegan Tuna Salad. HERE IT IS . Now, I have not eaten fish since I was a young girl so I can not imagine why ANYONE would want to recreate Tuna Salad (giggle) but I know that people do! So...I basically took her inspiration and ran with it!
She has tons of Vegan options so check her out at her site Hoppy Bottoms. 

This got me thinking...I REALLY miss chicken salad! Something HAD to be done! I really wanted to make some vegan chicken salad BUT I wanted it to stay as organic as possible. Storebought mayo is packed with chemicals and usually vegan options are too. Neither would work. I ran to the health food store and found that there are organic vegan mayo options available. SCORE!  *I also found some vegan chicken salad in the deli - it was $10 per POUND!!! For $10 you could make tons of this recipe!

And don't worry! If you are not vegan and want to make this, it is a crowd pleaser! It will just look like a chickpea salad not a "mock meat" recipe. You can still make it organic by using my 5 minute/5 ingredient  homemade mayo recipe found HERE. The chemical list for storebought mayo is pictured there as well so it is worth a look!

This vegan "chicken" salad recipe is so easy to make and can be altered in any way you would like to fit your favorite chicken salad. Since everyone has their favorite recipe, I am leaving the amounts off. This is merely for inspiration! This recipe from start to finish takes about 15-20 minutes and that includes toasting the chickpeas!

Here is what you will need:
I noted that I use organic. Please know that you can use ANY product available to you and it will still make an amazing vegetarian salad!
  • Can of chickpeas (I use organic but any will do)
  • Organic Vegan Mayo
  • Celery (diced)
  • Sweet Relish (organic)
  • Onions (diced)
  • Apples (small dice) - my favorite part!
  • salt, pepper, seasonings


Instructions:
  1. Now, this step may be  omitted but I believe it is what MAKES the salad. Drain your chickpeas and rinse well. Then toss them in a bit of oil and seasonings (my favorite is chili powder, salt, and pepper). Pop in the oven for about 15 minutes. For more complete instructions on making toasted chickpeas - click HERE. 
  2. Try not to eat all of the toasted chickpeas! They are addictive and a great snack but you need to remember that you are making chicken salad.
  3. While the chickpeas are cooking, dice your ingredients.
  4. Mix together all ingredients (including chickpeas) and finish with a sprinkle of salt and pepper!
  5. I like to allow this recipe to sit in the fridge in an airtight container for about an hour before serving. It really allows the flavors to melt together!
That's it! It is honestly that easy to recreate something that is vegan and organic!

If you would like some other recipes that can save you money while staying vegetarian....Feel free to check these ones out!

Try my SOY FREE Vegetarian Breakfast Sausage  Even the kids LOVE this recipe and eat it - usually before I get to! :(

You can also whip up some Vegetarian "Chicken" Nuggets in no time!


Also please remember to follow me on social media for updates!

Find me on Twitter, Facebook, and my other various outlets! I am always sharing great tips on living organically, vegetarian, and FRUGALLY!

Tuesday, October 8, 2013

Super Easy - Healthy NO BAKE Organic Protein Bars!


Over the past few months, my husband has become hooked on a new vice. Of all the addictions in the world; smoking, drinking, gambling, etc....he picks PROTEIN BARS! I should not complain...it is a healthy problem to have BUT it is also a $3 per bar addition. Yesterday, I believe it equated to a $20/day habit.

So...as many of you know, I am a total DIY girl and save money wherever I can. I took to the internet to find recipes and was sad when the first few pages of recipes were LOADED with sugar, processed ingredients, and junk. The other portion I found called for some crazy ingredients that I simply did not have on hand. One part of how I make organic work for a busy (LARGE) family is to keep it simple. These recipes were NOT going to work!

I decided to just take a base recipe and just wing it! These bars turned OUT AMAZING! There is little to no sugar in this recipe and they  were made with all organic ingredients. I think I am now stuck making these everyday! I made a whole tray of protein bars for the price of 2 bars!!! Score

I also chose not to bake them. This means that they are more like snack packs but they were still sooo good. I have added the directions of how to do these bars both ways.

I have to apologize in advance....I really don't have too many pictures of the bars as the kiddos broke into them before I got the chance to capture them on film!

They take about 15 minutes to make and can be altered to include your favorite nuts and dried fruits! You can also toss in your favorite health supplement like flax seeds, chia seeds, etc.

Ingredients: (I used ALL ORGANIC items BUT you can still make them healthy with your choice of brands!)
  • 2 cups raw oats
  • 2 cups toasted rice cereal (any cereal..I used toasted O's!)
  • 1/2 cup of peanut butter
  • 1/4 teaspoon of cinnamon
  • 1/2 cup of chopped nuts (optional)
  • 1/2 teaspoon of salt
  • 1 cup of any combination of dried fruits
  • 1/4 cup of agave syrup
  • Protein powder (optional)  - I did not specify an amount as each brand requires a different amount.  Simply adjust per recipe. This made about 10 bars. 
  • optional - I added in some organic chocolate chips!
Directions:
No bake -
  1. simply mix all ingredients together
  2. press firmly into greased baking pan
  3. sit in fridge to set bars
  4. Enjoy!
Baked -
  1. Mix all ingredients together
  2. press firmly into greased baking dish
  3. Bake at 350 degrees for about 5 minutes
  4. Allow to cool then enjoy!
I hope you try them and enjoy! They are healthy and frugal way to get your protein bar fix WITHOUT all of the junk and processed foods you find in traditional bars! In case you like to grab your protein bars pre-made...check out some of our favorites!!

Thursday, September 5, 2013

Healthy Black Bean Soup - A Quick Recipe

Since I am a vegetarian, it is important that I add protein into my meals whenever I can. For the first 4 years of my vegetarian life, I would say I was what i called a "BAD VEGETARIAN" or maybe you prefer "COOKIE-A-TARIAN". I assumed that cookies were vegetarian, cakes were vegetarian, and so were starchy sides---so I gained weight. Not only did I gain weight, but I wasn't the healthiest that I could be. So...when I started my organic lifestyle, I decided that me HEALTH was just as important as my disdain for meat!  IMy passion for being meatless and need for healthy options is  why protein packed legumes like Black Beans and Garbanzo Beans are a staple in my home. If you have kids...you know they could care less how nutritionally awesome they are...if it isn't what they like, they won't eat it. It is soooo important that I hide these nutritional powerhouses into my foods so my oldest doesn't hear, see, or think BEAN! So far, I have hidden beans in my black bean brownies, black bean cookies, sausage made with garbanzo beans, black bean meatballs and even some other creative goodies! Even this soup made the list ---after I blended it all the way!

I have two different versions this soup. 1 is a "quick cook" recipe involving only 2 cans of ingredients! ANYONE can handle this--Eating healthy shouldn't be a chore! The original recipe takes a few more ingredients and a little more cooking time but is still a quick fix.  I make this soup in a large batch because it has so many uses! You can use it as a soup; serve it atop nachos; drizzle it on hotdogs; serve it as a taco salad; and even as a yummy dip for bread!  I even make my own whole wheat tortillas- it is so easy to do and uses only 5 ingredients! The packages of tortillas you buy in the store are loaded with preservatives and chemicals...not mine! You can get the recipe HERE.

Both recipes are easy to make and are done in less than 30 minutes. This is NOT a recipe that you have to live by!  Add additional spices if you like your food spicy or add some smokey herbs for a more smoked flavor.

HERE IS A GOURMET TIP: Okay, maybe not gourmet but it does enhance the flavor in a crazy way. Add 1 tablespoon of unsweetened cocoa powder or a small handful of chocolate chips to your soup while cooking. Chocolate is an ingredient found in a traditional Mexican mole sauce and it will bring a truly amazing undertone to your soup.

Ingredients:
  • 2 cans of black beans (drained and rinsed)
  • tablespoon oil or cooking spray
  • 1 small onion, chopped
  • 1 tablespoon chili powder
  • 1 teaspoon ground cumin
  • 3 cups water
  • 1/2 cup of salsa (or canned tomatoes with chilies)
  • 1/4 teaspoon salt
  • 1 tablespoon lime juice
Garnish ideas:
Cilantro, sour cream, shredded cheese, tortilla strips, hot sauce,  diced onions, diced peppers, chives, tomatoes, etc.
Directions:
  1. Saute onions in the oil until almost transparent.
  2. Add in the seasonings
  3. Blend 1/2 of the beans in the blender until smooth. This step will thicken your soup (if you are hiding the beans like I do for my kids...blend them all!)
  4. Add the beans and salsa/tomatoes and cook for about 20 minutes
  5. Right before serving - squeeze in the lime juice. If you don't have lime--no worries! It is just an enhancement.
NOW...for the QUICK VERSION!

Ingredients:
  • 2 cans of black beans (drained and rinsed)
  • 1 can of  tomatoes with chilies. (depending on the brand you can find chili ready, tomatoes with chilies, etc)
Directions:
  1. Blend together half of your beans and the can of tomatoes
  2. Cook for a few minutes
  3. SERVE!
I hope your family enjoys this "health" based soup and can find even more ways to use it throughout the week!


PS. You can totally use this soup to make a SUPER HEALTHY TACO! Click HERE for my 5 steps to a HEALTHIER TACO!


Tuesday, September 3, 2013

Healthy Homemade Almond Butter

Hello, my name is Heather, and I am an almond butter..ADDICT! Okay, maybe there isn't a group for people addicted to almond butter BUT, if there were, I would need a seat and a doughnut (also an addiction).

So, you now may be asking WHY I am addicted to almond butter. The main reason is that it contains amazing health benefits! It is Naturally rich in Vitamin E and magnesium and offers more calcium, fiber, potassium, and iron than traditional peanut butter. It does ALL of this and with less saturated fat :)! It also doesn't hurt that Almond Butter is so versatile! You can use it as a dip, just as peanut butter, or even in a gourmet tasting FROSTING!

Now...for the UGLY side of Almond Butter....It is EXPENSIVE! One jar organic or All-Natural Almond Butter can cost close to $10!  As much as I love it....spending $10 for a jar that will be gone in a day is not going to happen at my house. So...I was lucky enough to have my Blogger Buddy Jelli from Jellibean Journals who recently shared a recipe for homemade All-Natural Peanut Butter.  I thought if it would work for Peanut Butter....it just might work for Almond Butter-IT DID!

I hate to say it but this is a very simple recipe - which is a HUGE plus in my house.  It is also a very CLEAN recipe with a SHORT ingredient list. We are avoiding all chemicals in our home so this is vital to us. This homemade almond butter is so easy to make that I can not believe that I did not try it before.....

INGREDIENTS:
Raw Almonds (500g)
1 ingredient! NO CHEMICALS!
  1. 3 cups of RAW or ROASTED almonds
Yep...THAT's IT! Feel free to toss in a hint of cocoa powder, salt, spice, honey, maple syrup, or vanilla to make a gourmet treat!


DIRECTIONS:
  1. Blend in Food Processor for about 10 minutes. make sure you scrape the sides down as needed.
  2. Store in fridge and always stir before you use it! The oils will naturally separate.
See...I bet you never knew it could be this easy to make homemade almond butter but after you try it....you will think it is the ONLY way to get your Almond Butter FIX!

If you enjoyed this recipe...check out a few of my other super easy organic recipes:

Super Easy Organic Ranch Dressing
Organic Peanut Butter and Chocolate Granola
2 ingredient Greek Yogurt Dough

There are many more on the site so stay a while and look around! Don't forget to follow me on Social Media! Facebook, Twitter, Pinterest

Don't forget to check out Conscious Box! Tons of fantastic Eco-Friendly Items delivered to your door each month! You can earn points for Freebies by reviewing the items you receive! That's a WIN WIN!

Thursday, August 29, 2013

Soy-Free Vegetarian Breakfast Sausage Recipe

I hate to admit it-I am a VEGGIE SAUSAGE ADDICT! Sounds harmless enough, right?!? Not to me. I am also trying to go as organic as possible (I am 95% of the way there) and the ingredient list on the box of my favorite veggie sausages just aren't sitting right with me.....

The brand shall remain nameless...

Ingredients:

WHEAT GLUTEN WITH WATER FOR HYDRATION, SOY PROTEIN CONCENTRATE WITH WATER FOR HYDRATION, WATER, CORN OIL, EGG WHITES, SODIUM CASEINATE, MODIFIED TAPIOCA STARCH, CONTAINS TWO PERCENT OR LESS OF SOYBEAN OIL, LACTOSE, SOY PROTEIN ISOLATE, HYDROLYZED VEGETABLE PROTEIN (WHEAT GLUTEN, CORN GLUTEN, SOY PROTEIN), AUTOLYZED YEAST EXTRACT, SPICES, NATURAL AND ARTIFICIAL FLAVORS, MODIFIED VEGETABLE GUM, SODIUM TRIPOLYPHOSPHATE, SALT, CARAMEL COLOR, DISODIUM INOSINATE, CRUSHED RED PEPPER, MODIFIED CORN STARCH, WHEY*, MALTODEXTRIN, RED BELL PEPPERS, HYDROLYZED WHEAT PROTEIN, POTASSIUM CHLORIDE, BLACK PEPPER, CAYENNE PEPPER, DEXTROSE, ONION POWDER, DISODIUM GUANYLATE, TETRASODIUM PYROPHOSPHATE, TRICALCIUM PHOSPHATE, SODIUM HEXAMETAPHOSPHATE, SUCCINIC ACID, NIACINAMIDE, MONOSODIUM PHOSPHATE, LACTIC ACID, ASCORBIC ACID, BREWER'S YEAST, TORULA YEAST, CALCIUM PHOSPHATE, SOY LECITHIN, IRON (FERROUS SULFATE), THIAMIN MONONITRATE (VITAMIN B1), PYRIDOXINE HYDROCHLORIDE (VITAMIN B6), RIBOFLAVIN (VITAMIN B2), VITAMIN B12.

NOTHING about that list says organic! It may be lower in fat and cholesterol than traditional sausage but I see tons of modified foods and chemicals in the ingredient list. This forced me to go without my favorite breakfast food! Let's not even mention the price of the meatless options. It's something like $5 for 6 small patties. NOT hitting my budget line either.

So, I looked online to find something I could easily and inexpensively make at home. I found many recipes that used TVP (which is debatable by many for those who are eating organically), tempeh, gluten products, and soy. Who readily keeps these items readily at home? Okay...maybe a few of us but I was looking for a "cleaner" - less processed- version of the recipe.

This recipe can be edited and adjusted to suit your favorite type of sausage. Add Italian spices if you like or add some apples and jalapenos for a twist!  Just start with the base and party on!

Ingredients:
  • 1 can of rinsed Garbanzo Beans
  • 1 cup of Organic Oats
  • 2 Tablespoons of wheat flour
  • 1 egg (can be omitted to be vegan)
  • 1/2 teaspoon of mustard
  • 1 teaspoon of crushed fennel seed
  • 1 teaspoon crushed red pepper
  •  1 teaspoon of sage
  • 1 teaspoon minced garlic
  • 1-2 teaspoons of sweetener. I use Stevia or Organic Maple Syrup. Any sweetener will work.

 Directions:
  1. Add all ingredients except oats into a food processor. I like the texture of the Garbanzo beans so I sometimes mash the ingredients together with the bottom of a cup to avoid the food processor mess!
  2.  Add in the oats and stir one last time. 
  3. Form into "patties" and grill over medium high heat until golden brown on both sides.

If you are looking for some other Vegetarian recipes...Check out My vegetarian Chicken Nuggets Also made with Garbanzo beans. I try to prep these on the same day as the ingredients are very similar! You can also add an easy hummus dip to the day! The star of that heart healthy dish is also---The garbanzo bean!


BLOG TEMPLATE BY DESIGNER BLOGS
